
Manzanita Beach House
It’s been a while since we’ve had the fun of a before & after post, and now that the dust is settling from COVID, it was finally time to get some shots of our latest design and build! (Really, it’s our FIRST design & build) We were fortunate enough to have been brought on by our build “coach”, Trace Baron at Baron Construction (thanks for the guidance, friend!) to assist in the project and eventually finish it off so his team could move on.
I have to admit, the first time I walked through this home, I saw the potential, but also was a little intimidated by the amount of work that was needed to get this space where it deserved to be. Thank goodness we all hung in there, despite it taking MUCH longer than initially anticipated. The homeowners were such troopers, and we’re thrilled to say that we made some amazing friends through this process.
A Place to Indulge
We all know a kitchen is where we cook, where we gather with guests, but what is a kitchen when it is our vacation home? It’s a place to indulge. A place for a cappuccino, a cocktail, or a special meal with a loved one.

BEFORE: To say this kitchen was cramped was an understatement. Shimmy past the fridge, and lock yourself into the kitchen with about 33” clear from counter to counter. No thanks!

AFTER: We took the peninsula out, providing ample space to access this adorably bright and sunny retro-inspired kitchen.
A Place for Relaxation
Who wouldn’t want to sit in this lovely room soaking up the sun, or on a cold day curling up next to the fire? It felt so good to breathe new life into this home, and to see our homeowners come in with their fantastically stylish furnishings was the icing on our cake!

BEFORE: An adorable wood stove and fantastic large windows gave this space all the potential it needed to wake up from the 70’s and enjoy the refresh (to the right).
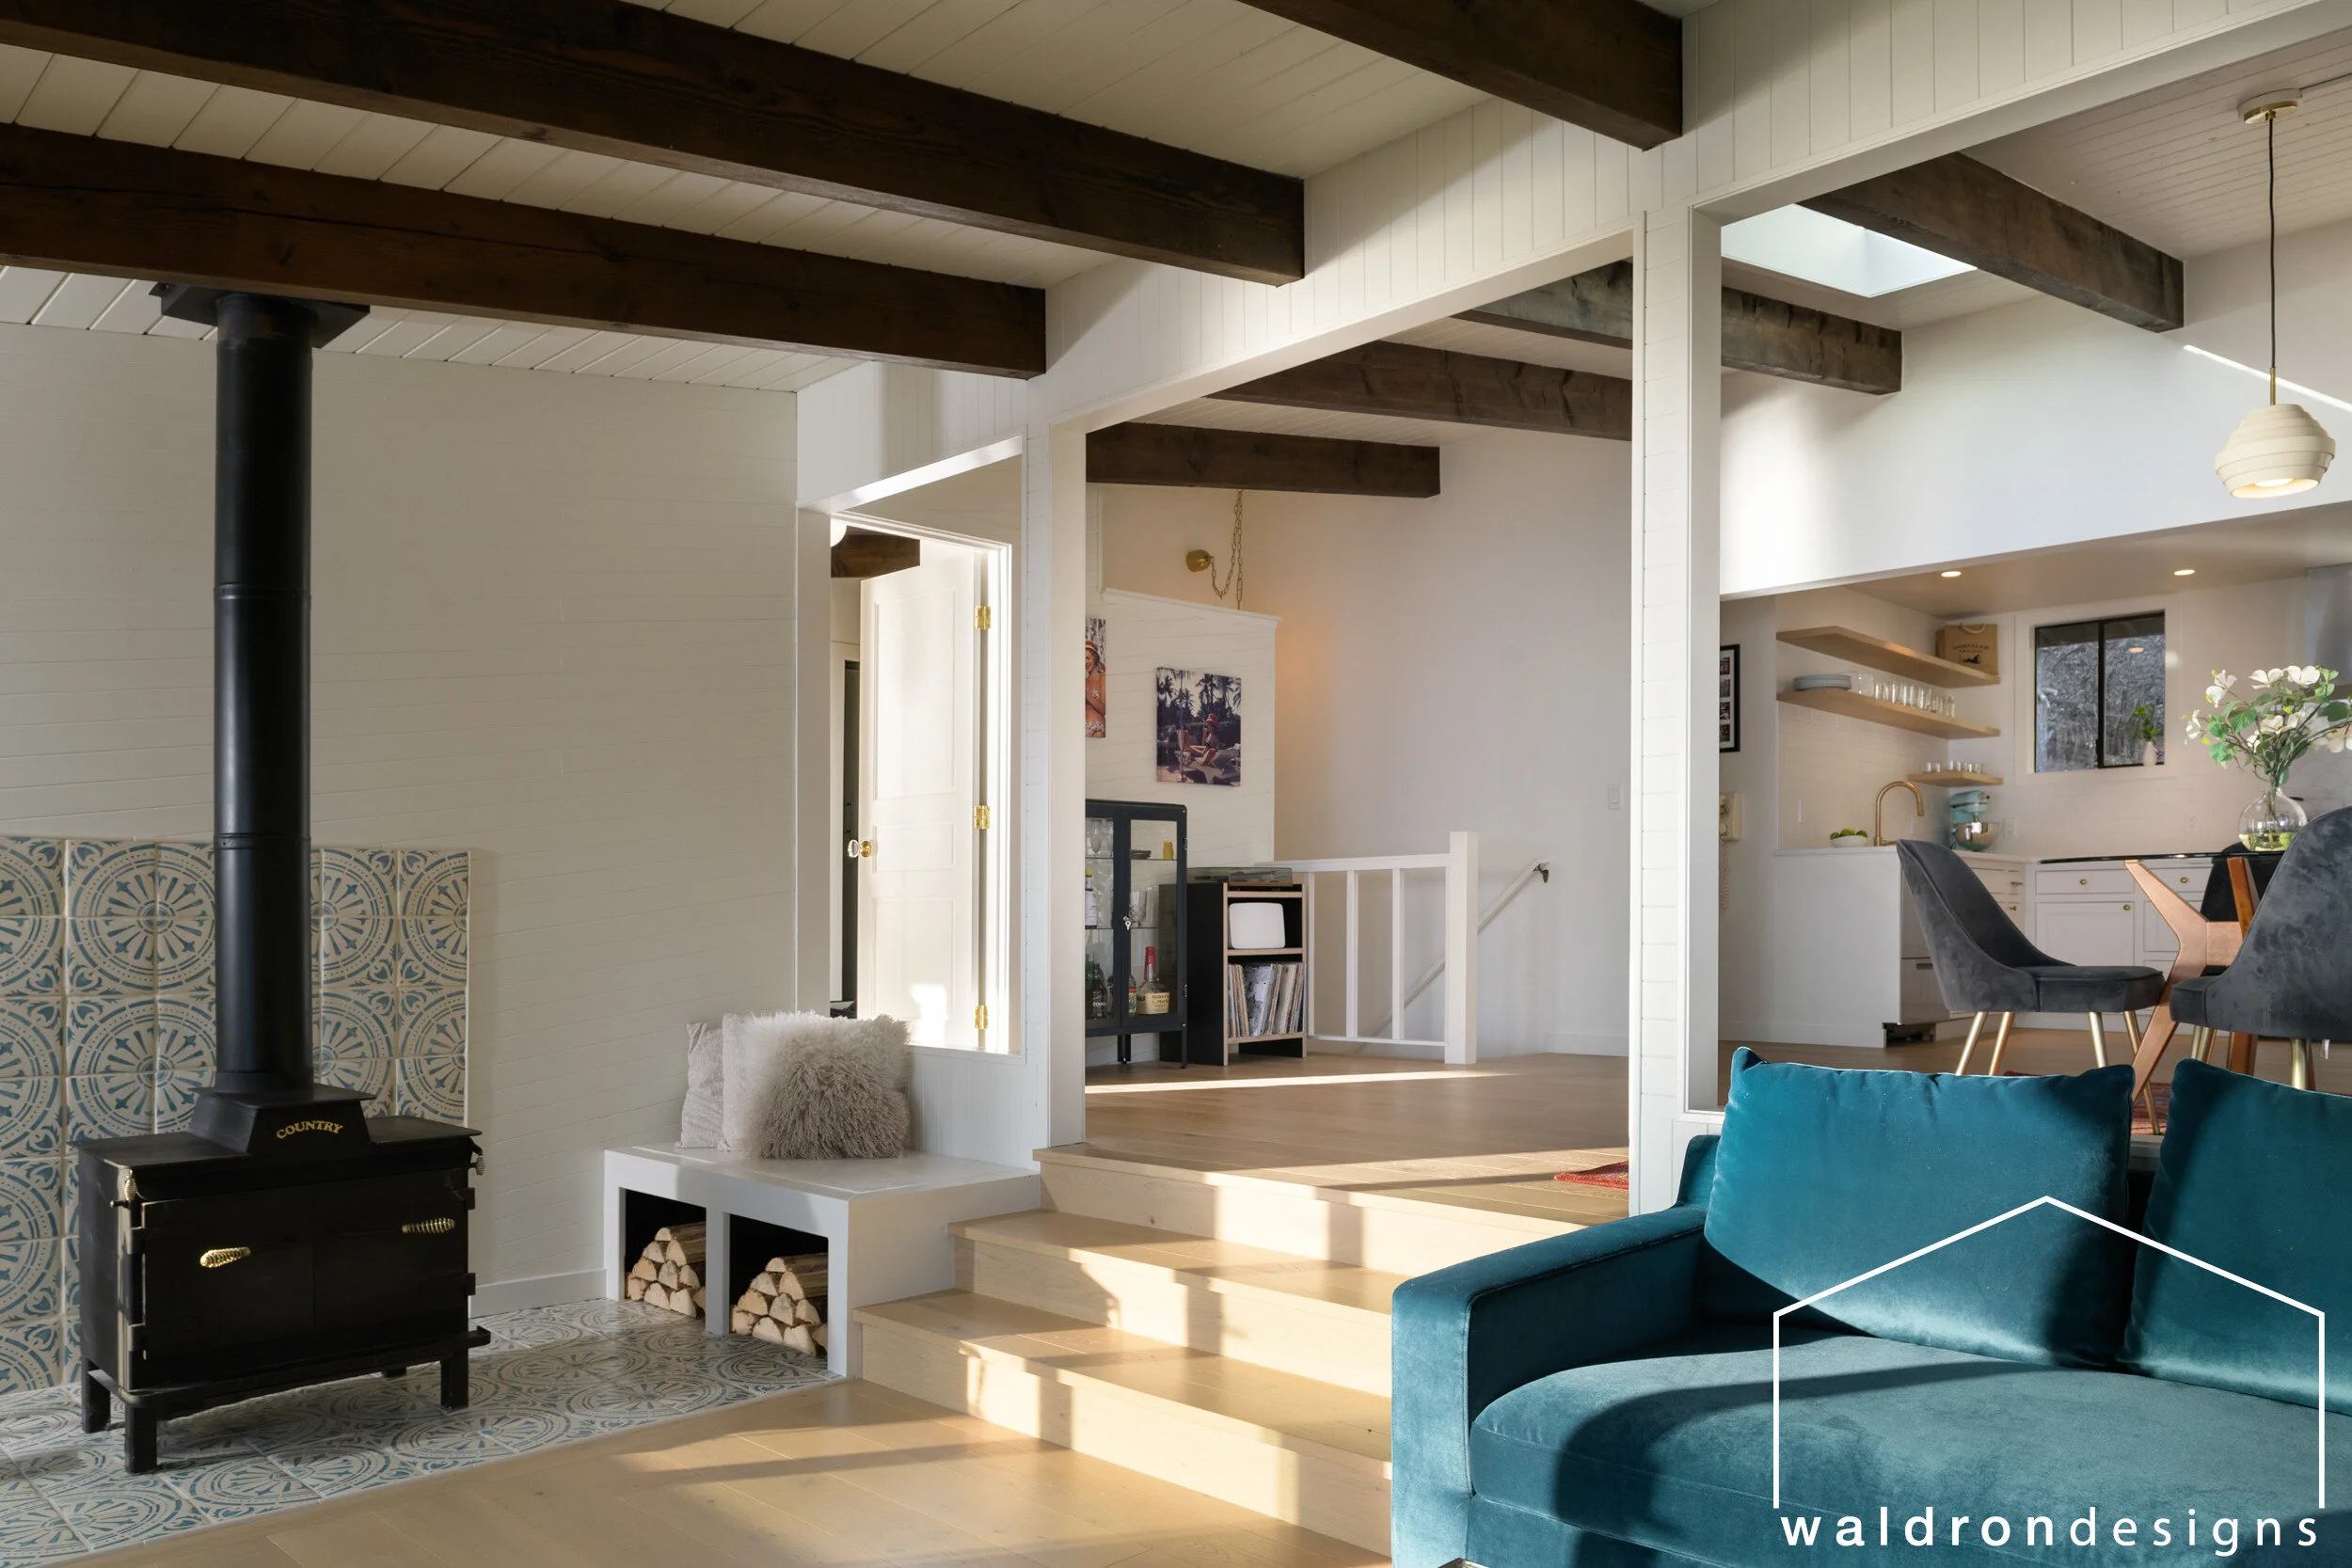
AFTER: We loved that there was a built in bench before the remodel, but the access was through the top, which wasn’t fantastically convenient. Some updated tile, flooring, paint… well, updated just about everything and we are on our way into a space that feels like the beach home it is!
BEFORE: Confession- I’m pretty anti-carpet as a whole. It’s a bacteria-fest! Stained carpet is the kicker, we couldn’t have been more happy to pull that out of there!
PROGRESS: Our team takes photos of homes during the progress to keep our clients informed and in tune with what is happening in their home when they aren’t there. Here is a shot after the carpet was removed and flooring well on it’s way. Demo feels good, doesn’t it?!

AFTER: While we can’t take credit for the amazing views (or the furniture, selected by our stylish client), we are happy to have updated this space with a brighter color, some amazing flooring, and doors that create a stronger connection to the exterior spaces. Tip: When you have a view like this, let the view be the focal point. Before, the beams blended with the ceiling, but painting that ceiling white allows the beams to draw the eye out to the water.
A Place for Guests
A bathroom should always feel light and bright, never dark and dingy. This updated space offered some sparkle and glamour while utilizing the existing fantastic cast-iron tub.

BEFORE: Dated sink cabinet + blah tile surround and you’d never notice the lovely cast-iron tub!

PROGRESS: Sometimes in the midst of construction, a protected bathtub becomes a great storage spot for the crew’s supplies ;)

AFTER: I couldn’t be happier with the floor tile and vanity the homeowner selected. We shared our selections for the faucets, wall tile, mirror and lighting and this collaboration came to such a beautiful finish.
A Place for Self-Care
This bathroom was TIGHT. Narrow with a 90-degree turn to reach the toilet/shower “compartment”. Simply relocating the closet gave so much more space, and still plenty of closet storage.

BEFORE: We all love some carpet in the bathroom, right? Right? No, we really don’t. What we can’t see is that immediately behind this door is a linen closet with accordion doors followed by more closet around the corner. Neverending narrow spaces…

AFTER: We pulled out the linen closet behind the door, which lets the door open more fully and re-oriented the closet location. Add some floor-to ceiling tile for drama and contrast.

BEFORE: With barely enough room to get to the toilet, we felt it was important to REALLY re-think this space.

PROGRESS: Bumping out that wall, and taking a peek into the size of the space.

BEFORE: Directly across from the toilet, an itsy bitsy shower…

PROGRESS: I got some demo training from the crew. My first swing of a sledgehammer!

AFTER: Still a small space, we bumped the wall just enough to give the room a bit more breathing space. We also removed the barrier to the shower entirely and tiled every wall as well as the ceiling. The toilet is wall-mounted, and tucked into the wall, a water-tight niche for toilet paper. A true wet room, allowing our homeowners to spray down the full space for a good clean.
A Place to Clean
This room was in a sad state. I know that a laundry room is not always the TOP priority, but this one gave me the heebie-jeebies. How can anyone feel as though they are cleaning their home when stepping into a space that feels inherently dirty? We reused the existing cabinets with a spot of paint and gave this space the refresh that it deserved.

BEFORE: The vintage cabinet was just fine for these needs, but the low plastic ceiling and dated finishes were aching to be updated

BEFORE: A shower in the laundry room did not feel necessary with the guest bathroom upstairs, so we relocated the toilet to this space.

Immediately upon shimmying through the 28” clear doorway, one could just fall right onto the toilet. This guy got relocated to give entrants a bit more flexibility.

AFTER: Some new flooring, painted cabinets, and after a leaky w/d, it didn’t hurt to update these as well. Phew, feels so much better!
A Place for Recreation

BEFORE: Metal shades and plain white walls do not a good basement make.

AFTER: I can’t say how many times I’ve suggested that basements embrace the dark. Yes, they are dark and below ground, and often have less than ideal views. This is why we need to make the interior the view. Stop trying to connect them to the outdoors that they cannot see. Instead, try connecting to the earth they sit within. I was so happy to hear this homeowner wanted to go dark!
A Place For Solace
This dated bedroom-turned-studio now glows in the sunlight, feeling brighter, despite the darker colors!

BEFORE: So grateful to our homeowner for this photo, because we realize that we did not get this angle before! This space had some pretty commercial feeling carpet (80’s commercial, that is), and was very small and narrow due to the built in closets.

AFTER: Also in the basement, we embraced the darkness, allowing sunlight to spill in with such splendor! While it’s out of the shot, we did remove the closets to make room for this client’s wonderful studio space.
This project was full of adventure, collaboration, and energy. We were so lucky to have the mentorship of Trace Baron as he invited us to participate and eventually manage the final stages of the build. Beyond the fantastic mentorship, we had amazing trusting clients to allow us to step in as a brand new design-build team to finalize this project.


More Articles You Might Like:


Waldron Designs, LLC is passionate about designing spaces rooted in their context and responsive to the natural environment. Are you ready to create sustainable permanence with your home?
GET IN TOUCH!